Easy to create blog site even for beginners
Development Preparation
- Figure-01: “Build virtual environment (line 1)” in any folder
- Figure-01: Virtual environment execution (When executed, “(myvenv)” appears at the leftmost position)
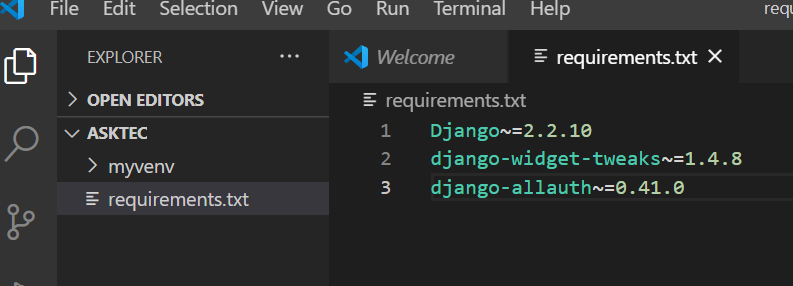
- Figure-02: Creating requirements.txt (describing packages required for development)
- Figure-02: Package installation (pip3 install -r requirements.txt)

Create Project


- Figure-03: Project Creation (“mysite . is an arbitrary name. Project name space period, which can be created directly under the directory)
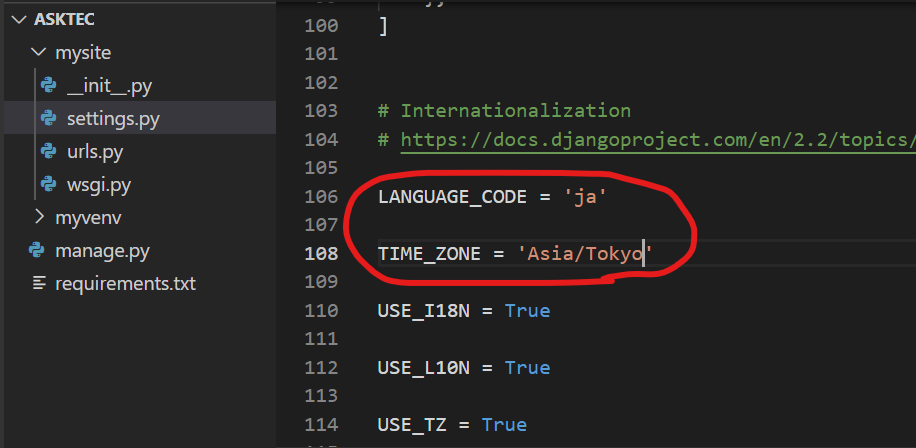
- Figure-04: mysite -> setting.py to change settings (language and time zone)
- Figure-05: Migrate (database setup)
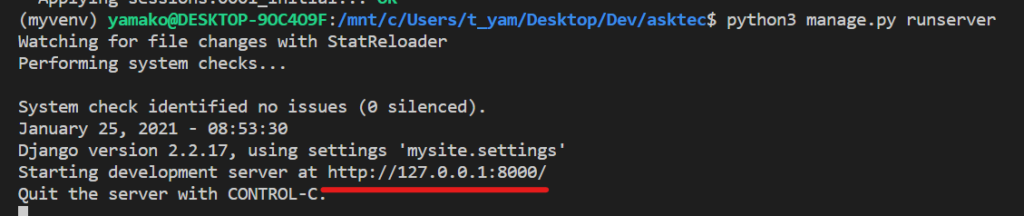
- Figure-06: Web server startup
- Figure-07: Access the URL and confirm Django installation

Create Application
- Figure-08: Application creation (“app” is an arbitrary name)
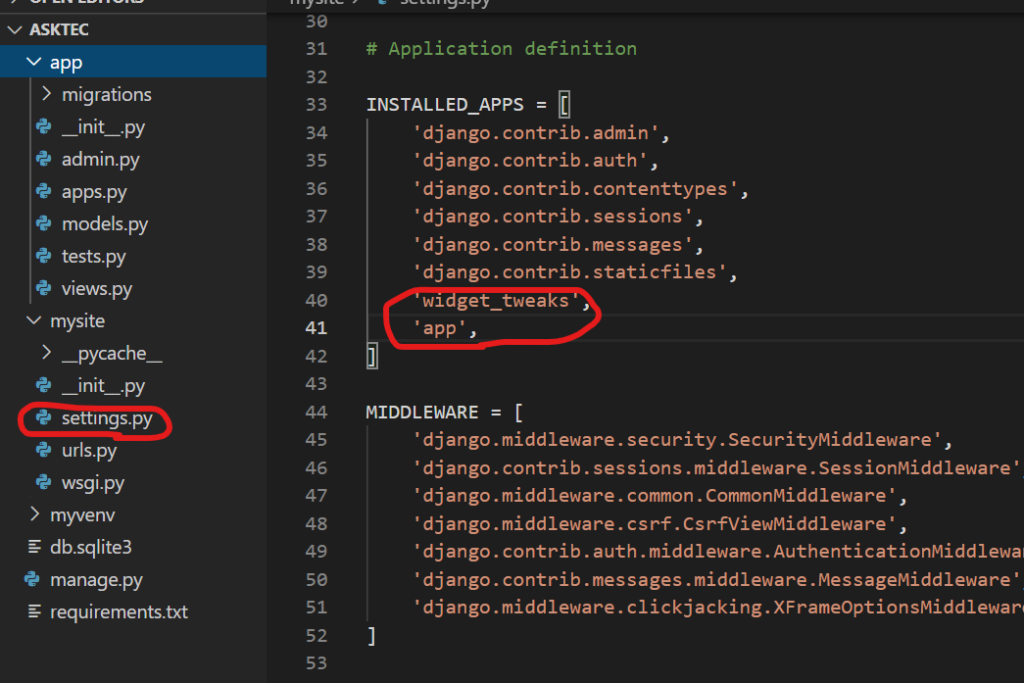
- Figure-09: mysite -> settings.py -> ‘widget_tweaks’, ‘app’, added

Model
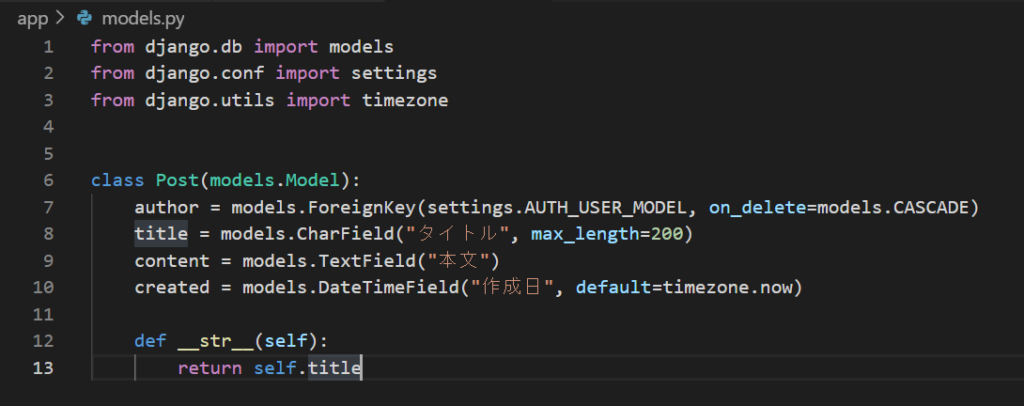
- Figure-10: app -> models.py “class name: Post” is optional. author = models.ForeignKey(settings.AUTH_USER_MODEL, on_delete=models.CASCADE) *ForeignKey is linked to login linked to the user.
def str(self) allows you to define a name (string) to identify the data (records) in the model that will be displayed on the admin screen.
We have defined the title, text, and created_date fields in the Post model, and in def str(self) we return the title field
https://office54.net/python/django/model-str-self
Admin
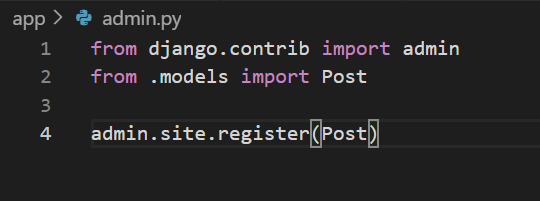
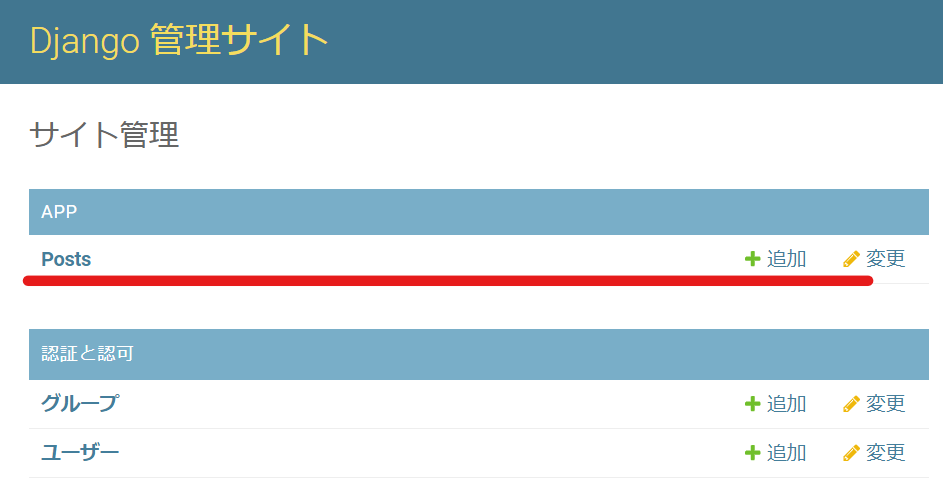
- Figure-11: Reflecting the model just created on the admin page: app -> admin.py
- Figure-12: Migration: python3 manage.py makemigrations (required when changing models)
- Figure-12: migrate: python3 manage.py migrate
- Figure-13: Creating an administrative user: python3 manage.py createsuperuser
- Figure-14: Web server startup: python3 manage.py runserver: Add /admin to the URL and log in with the username and password you just set.
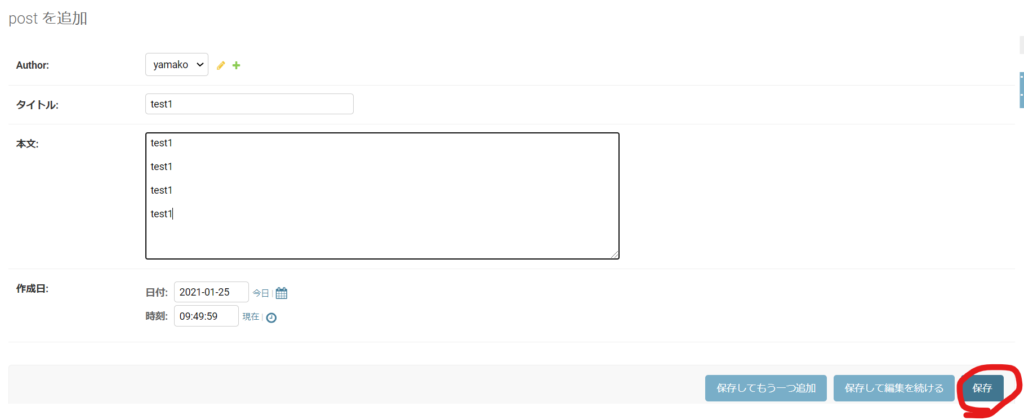
- Figure-15, 16: Register a few dummies in “Post” (for layout confirmation)


Routing (URL)
There are two types of routing, one for projects and one for applications.
1. For projects (for management sites and applications)
2, For applications (URL and view matching)
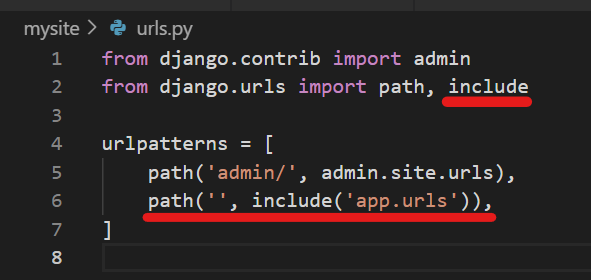
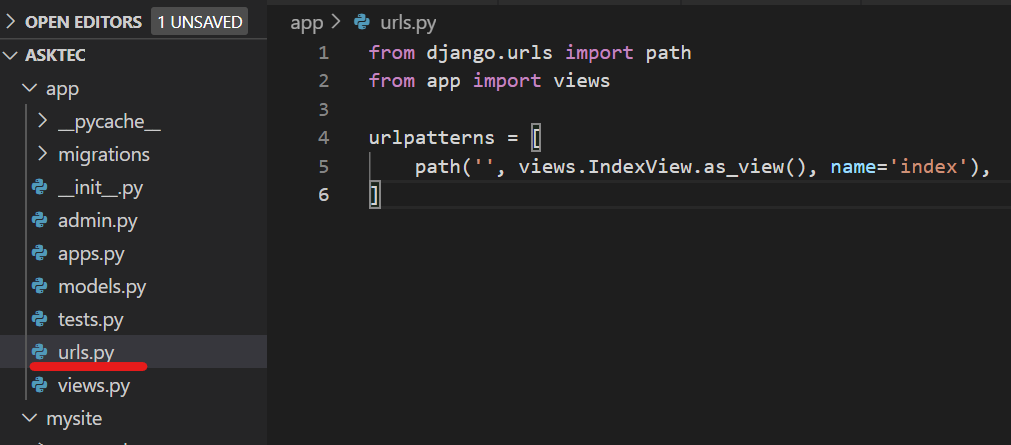
- Figure-17: mysite -> urls.py (routing for project)
- Figure-18: app -> urls.py (creating and routing urls.py for the application)

views.py
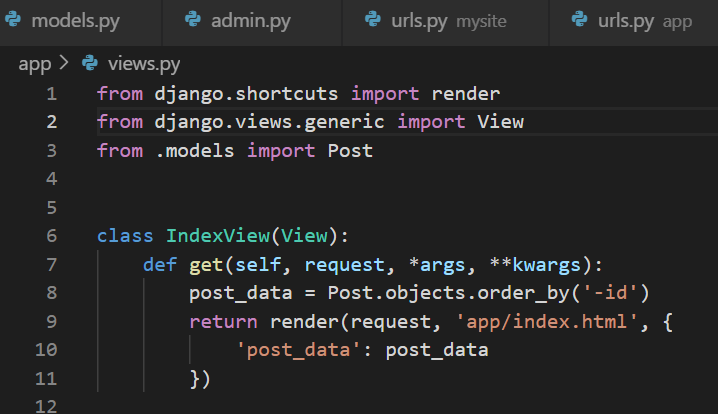
- Figure-20: app -> views.py Edit: Importing View and Post
- Figure-20: Edit the top page view (index)
- Figure-20: get function, the first function called when the view is called
- Figure-20: Retrieving data from the Post model
- Figure-20: return -> pass data to the template specified by the render function
templates: base.html
Template converts data passed from view to HTML
- Create “templates” folder in app
- Figure-21: Create “app” folder in templates
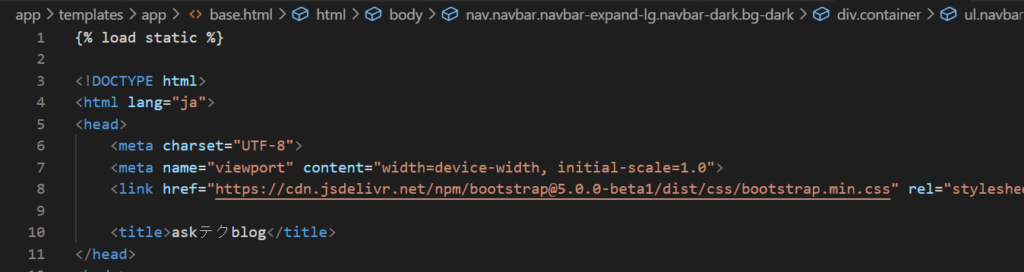
- Figure-21: Creating “base.html” in app -> templates -> app ->
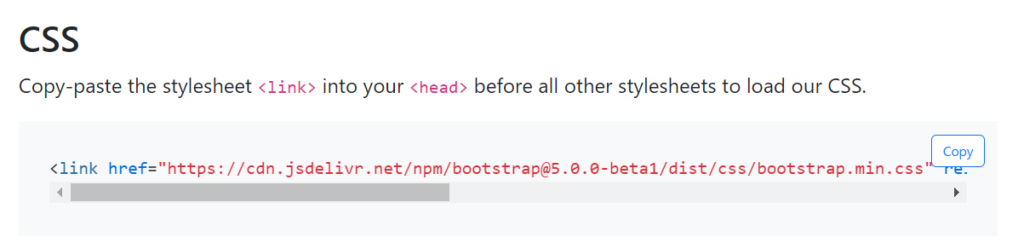
- Copy and paste code from bootstrap
base.html often writes “headers, navigation, footers” that do not change dynamically
Django入門ブログ構築チュートリアル レッスン2
templates: index.html
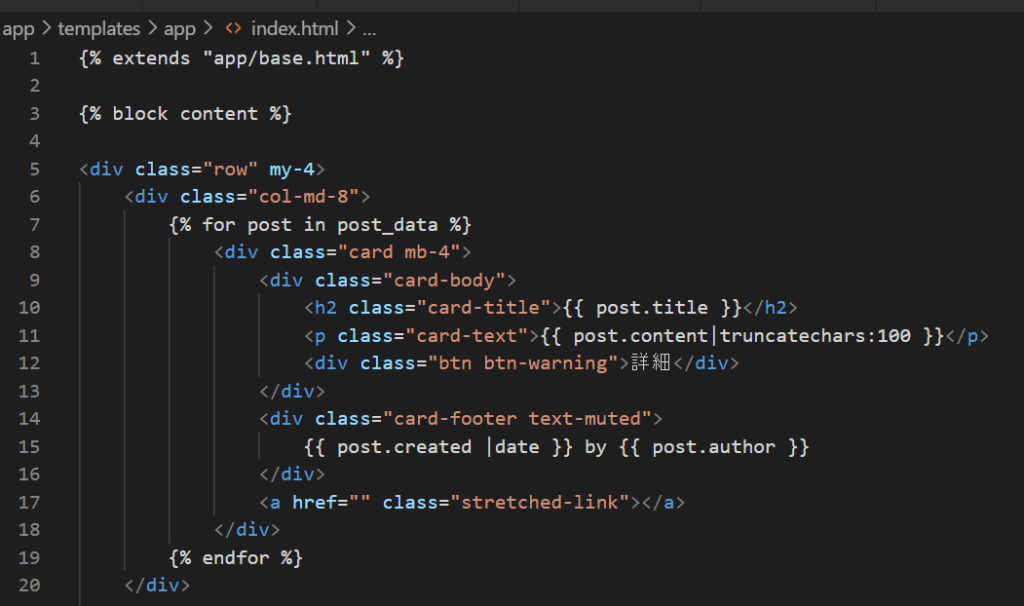
- Figure-22: Loading base.html in the first line
- Figure-22: Loading postings with {% %}
- Figure-22: Reading an object specified by {{ }}
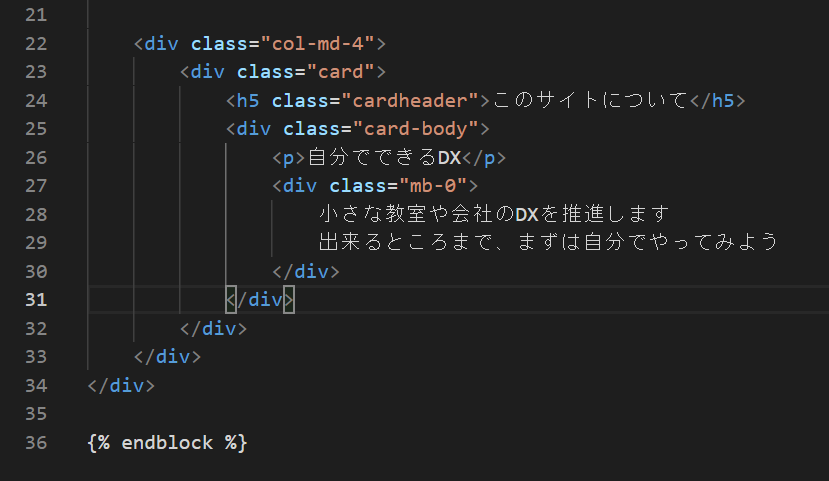
- Figure-23: Creating the sidebar
CSS
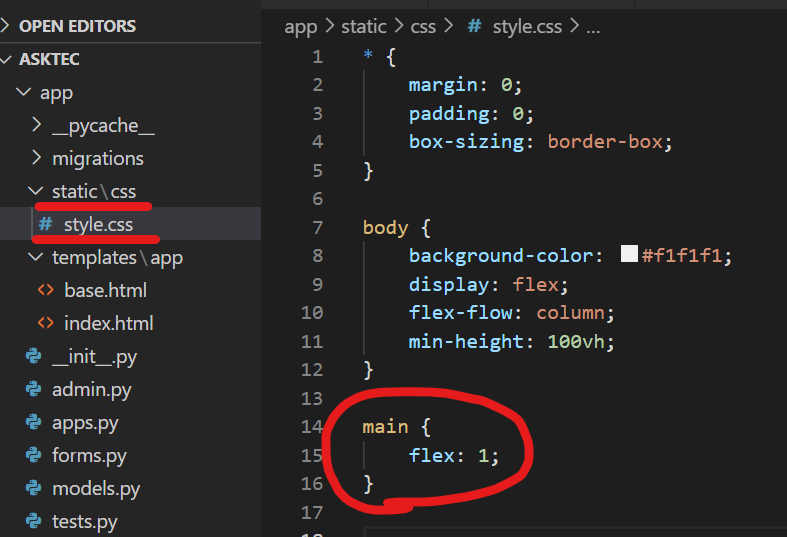
- Figure-24: app -> static folder creation -> css folder creation -> style.css file creation
- Figure-24: main { flex: 1; } to always place the footer at the bottom
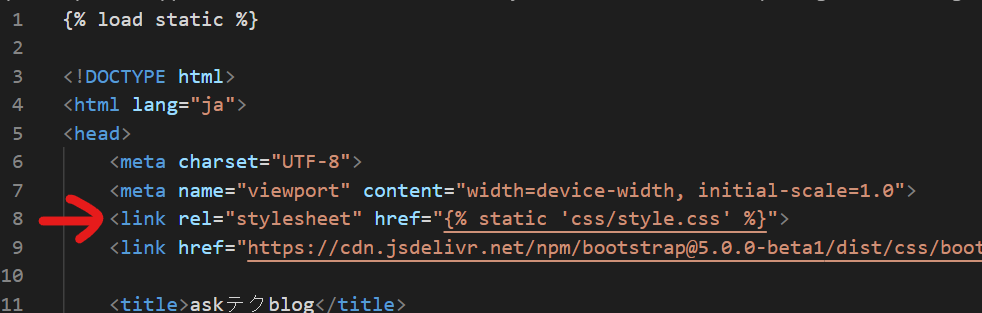
- Figure-25: Adding stylesheet to base.html
- Figure-26: Start the web server and click on the link
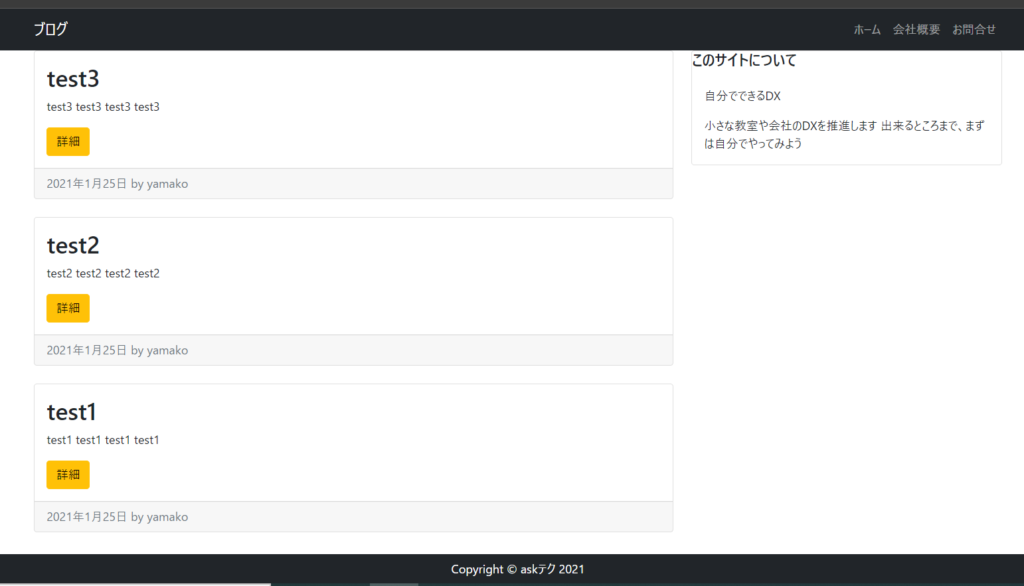
- Figure-27: Check the contents of the top page

Detail Page
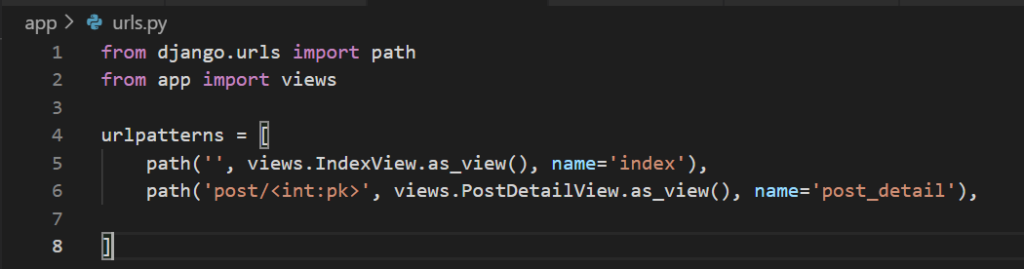
- Figure-28: app -> urls.py with path for detail screen (post_detail)
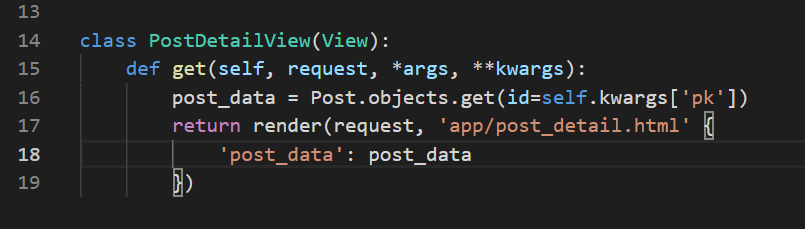
- Figure-29: Add detail screen class to app -> views.py
- Figure-29: post_data = Post.objects.get(id=self.kwargs[‘pk’]) to get the data associated with the id (pk) of each post
- Figure-29: Calling the render function with return to pass data to the template
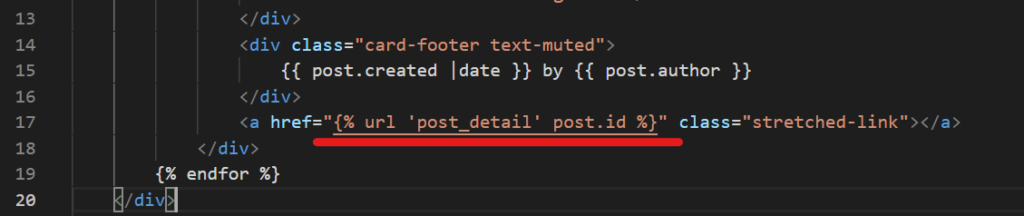
- Figure-30: app -> index.html Add link for more details
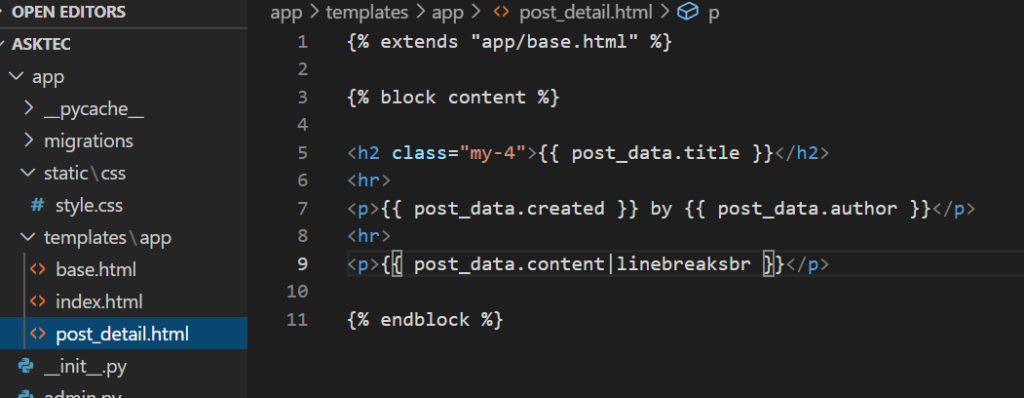
- Figure-31: app -> templates -> app -> post_detail.html created
Upload Images
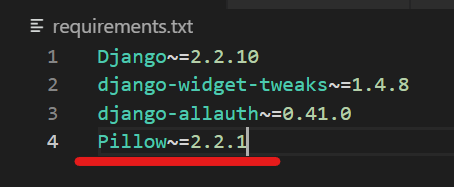
- Figure-32: “Pillow~=2.2.1” added to requirements.txt
- Figure-33: Installing with pip3 install -r requirements.txt
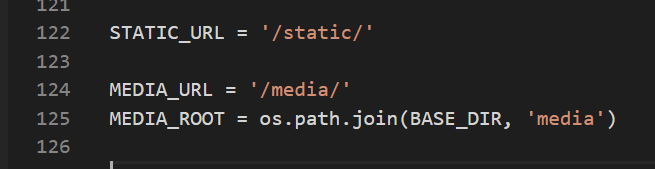
- Figure-34: Add image upload destination in mysite -> settings.py

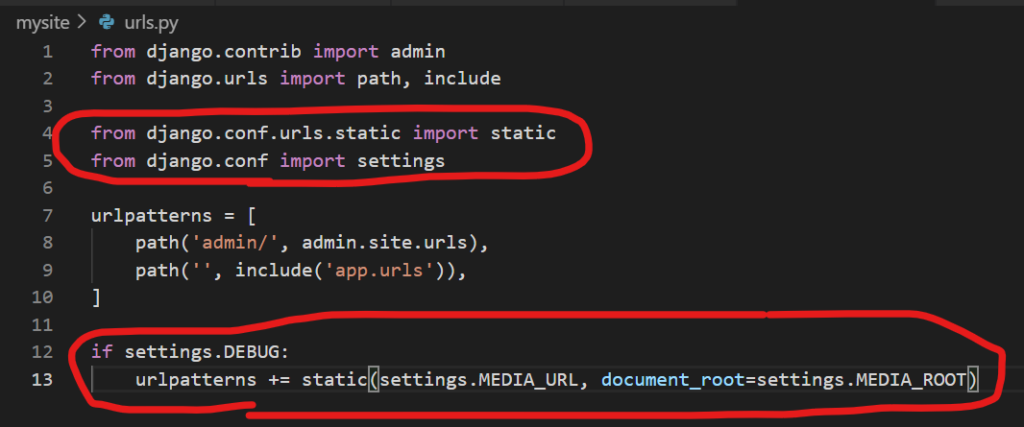
- Figure-35: mysite -> append to urls.py
- Figure-35: if settings.DEBUG: … is for development environment *not when deploying
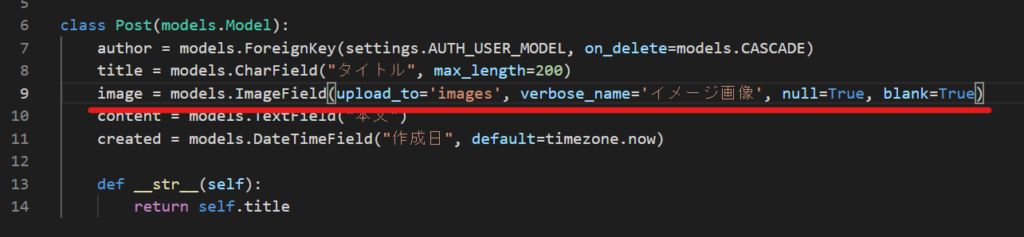
- Figure-36: Append to class Post in app -> models.py
- After editing models.py, be sure to run “python3 manage.py makemigrations” and “python3 manage.py migrate
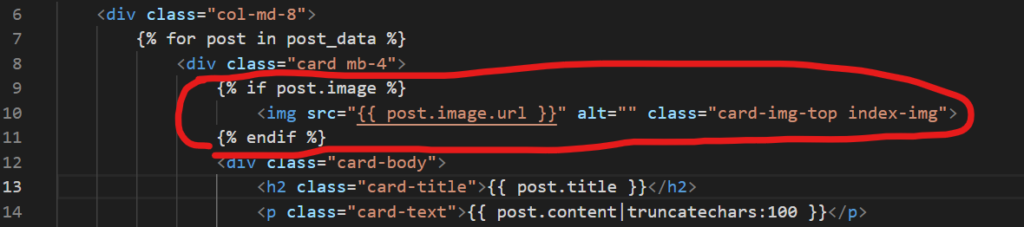
- Figure-37: Displaying images in index.html
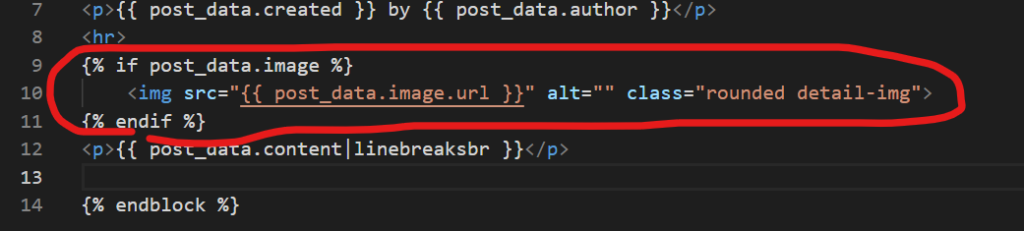
- Figure-38: Displaying images in post_detail.html
- Both with {% if post.image %}, no error without image
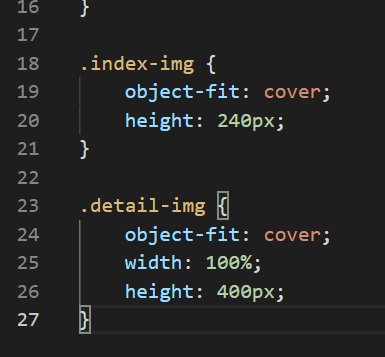
- Figure-39: Editing style.css